August 9th, 2024
New
🚀Introducing UFP Lead Form Plugin for WordPress! 🌟
🌟 We’re Excited to Announce Our Latest Launch! 🌟
Unified Fitness Platform - Lead Form Plugin for WordPress! Enhance your site’s functionality and streamline lead management effortlessly.
What is WordPress?
WordPress is a content management system (CMS) that allows you to host and build websites. WordPress contains plugin architecture and a template system, so you can customize any website to fit your business, blog, portfolio, or online store.
How Unified Fitness Platform Lead Form Will Work with WordPress?
We offer a plugin named "Unified Fitness Platform - Lead Form" that allows you to integrate the UFP Lead Form into your WordPress site.
To get the lead form working on WordPress, follow these steps:
Install the Plugin:
Go to the WordPress “Admin panel”.
Navigate to the "Plugins" section.
Choose the "Upload Plugin" option and upload the plugin provided by UFP.(Download plugin)
Note: Once the plugin is available in the marketplace, you can install it directly from there.

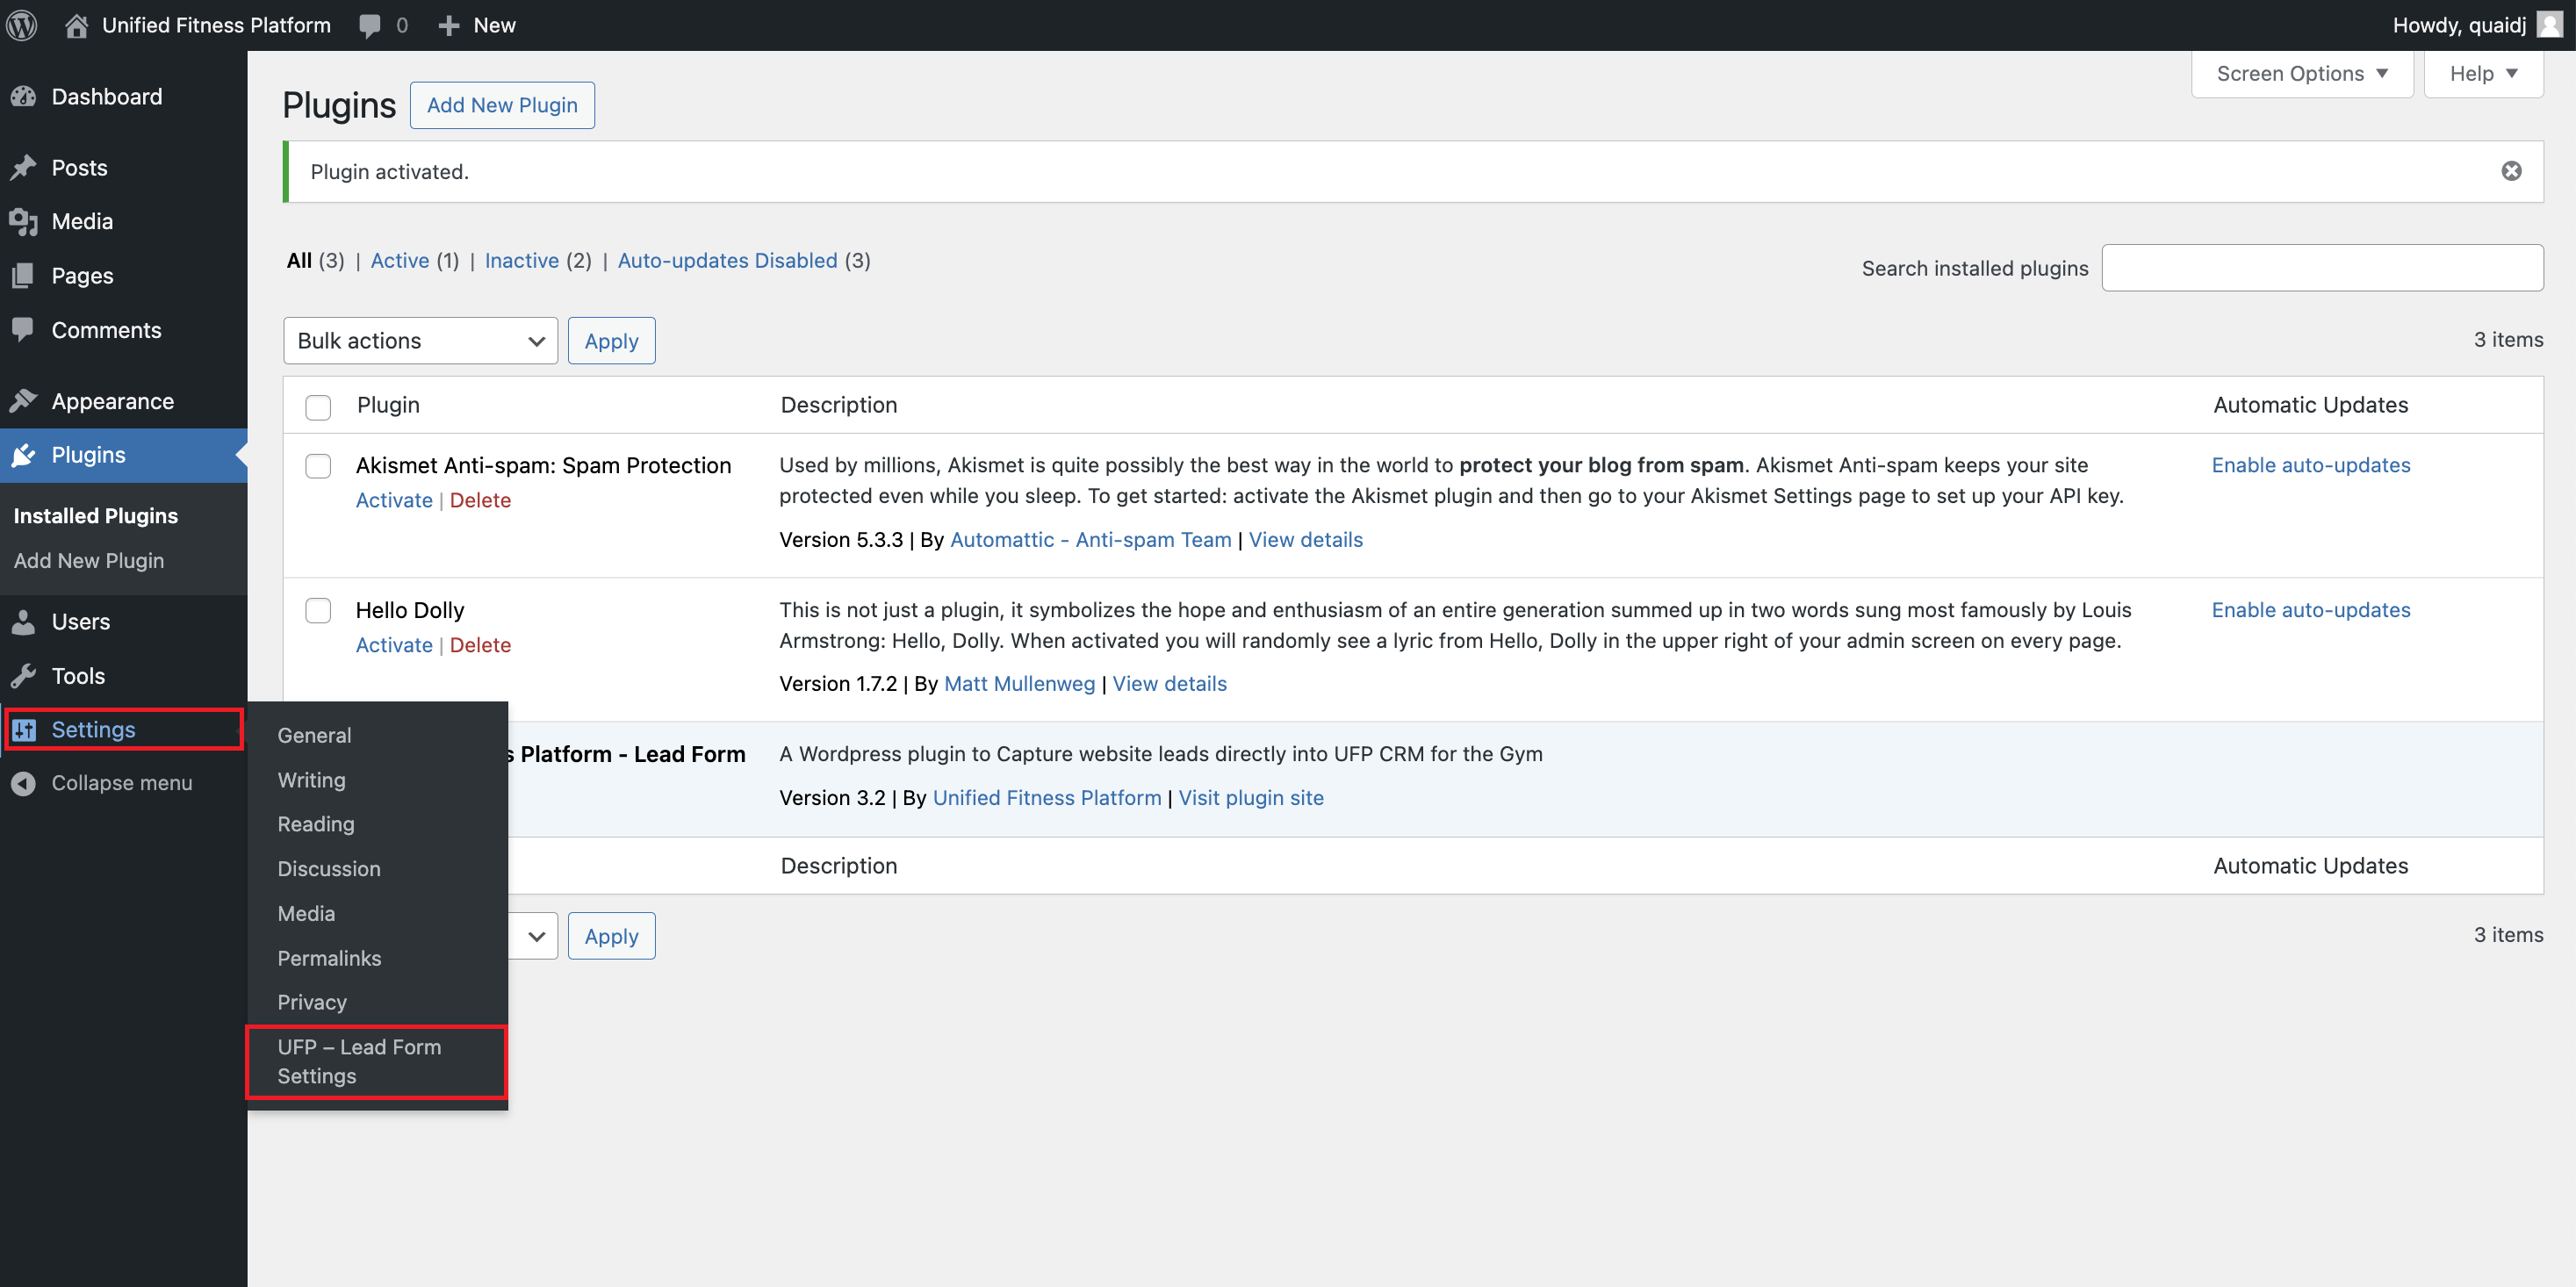
Activate the Plugin:
After installation, you will find the plugin under the "Plugins" tab, named “Unfied Fitness Platform -Lead form:
Ensure the plugin is activated for it to function properly.

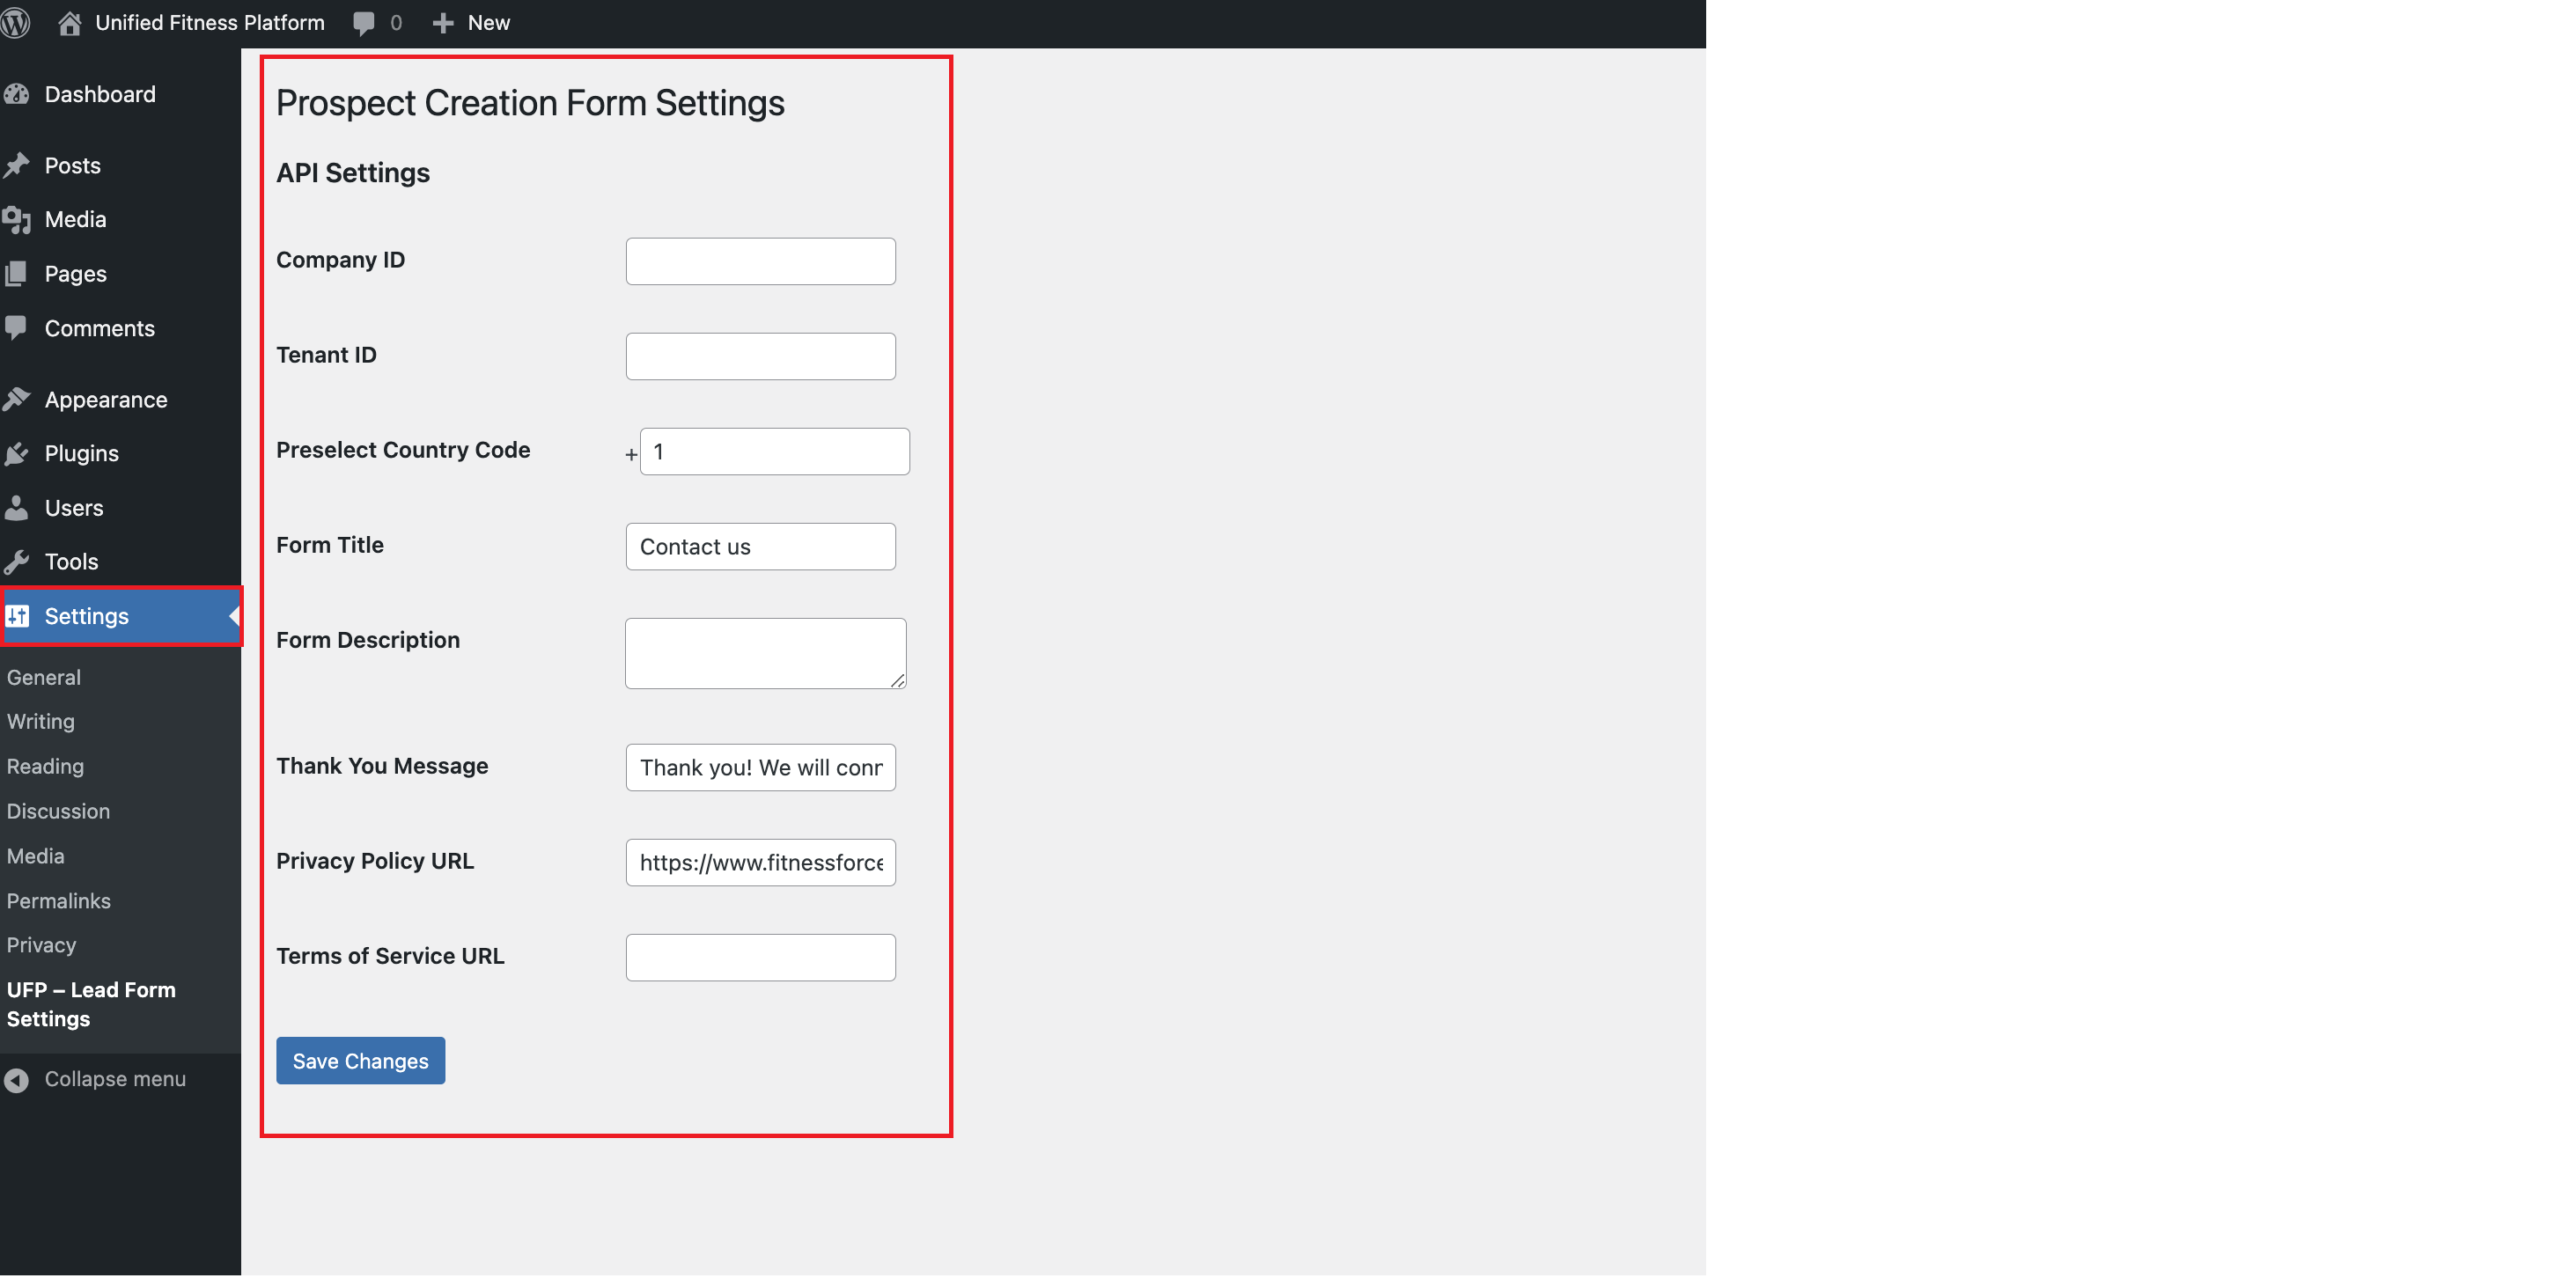
UFP - Lead form Settings:
After the plugin is installed and activated, complete the lead form settings to specify which company and tenant should receive the leads. The tenant ID you configure will receive the leads and display them under that tenant in the software. To complete the configuration, navigate to the settings page —> UFP Lead Form Settings and fill in the following information:
Mandatory:
Company ID: UFP company ID (contact your account manager to obtain the company ID).
Tenant ID: Tenant ID (contact your account manager to obtain the tenant ID).
Preselected Country Code: Configure the dial code.
Privacy Policy URL: Provide the privacy policy URL of your company. This will be displayed on the form and must be accepted by clients when filling out the form.
Non-Mandatory but Recommended:
Form Title: Title you would like to give to the form (e.g., "Contact Us").
Form Description: A brief description of the form (one or two sentences).
Thank You Message: Success message to be shown after the lead form is submitted successfully.
Terms of Service URL: If provided, this will be shown on the form and must be accepted by clients. If not configured, this field will not appear.
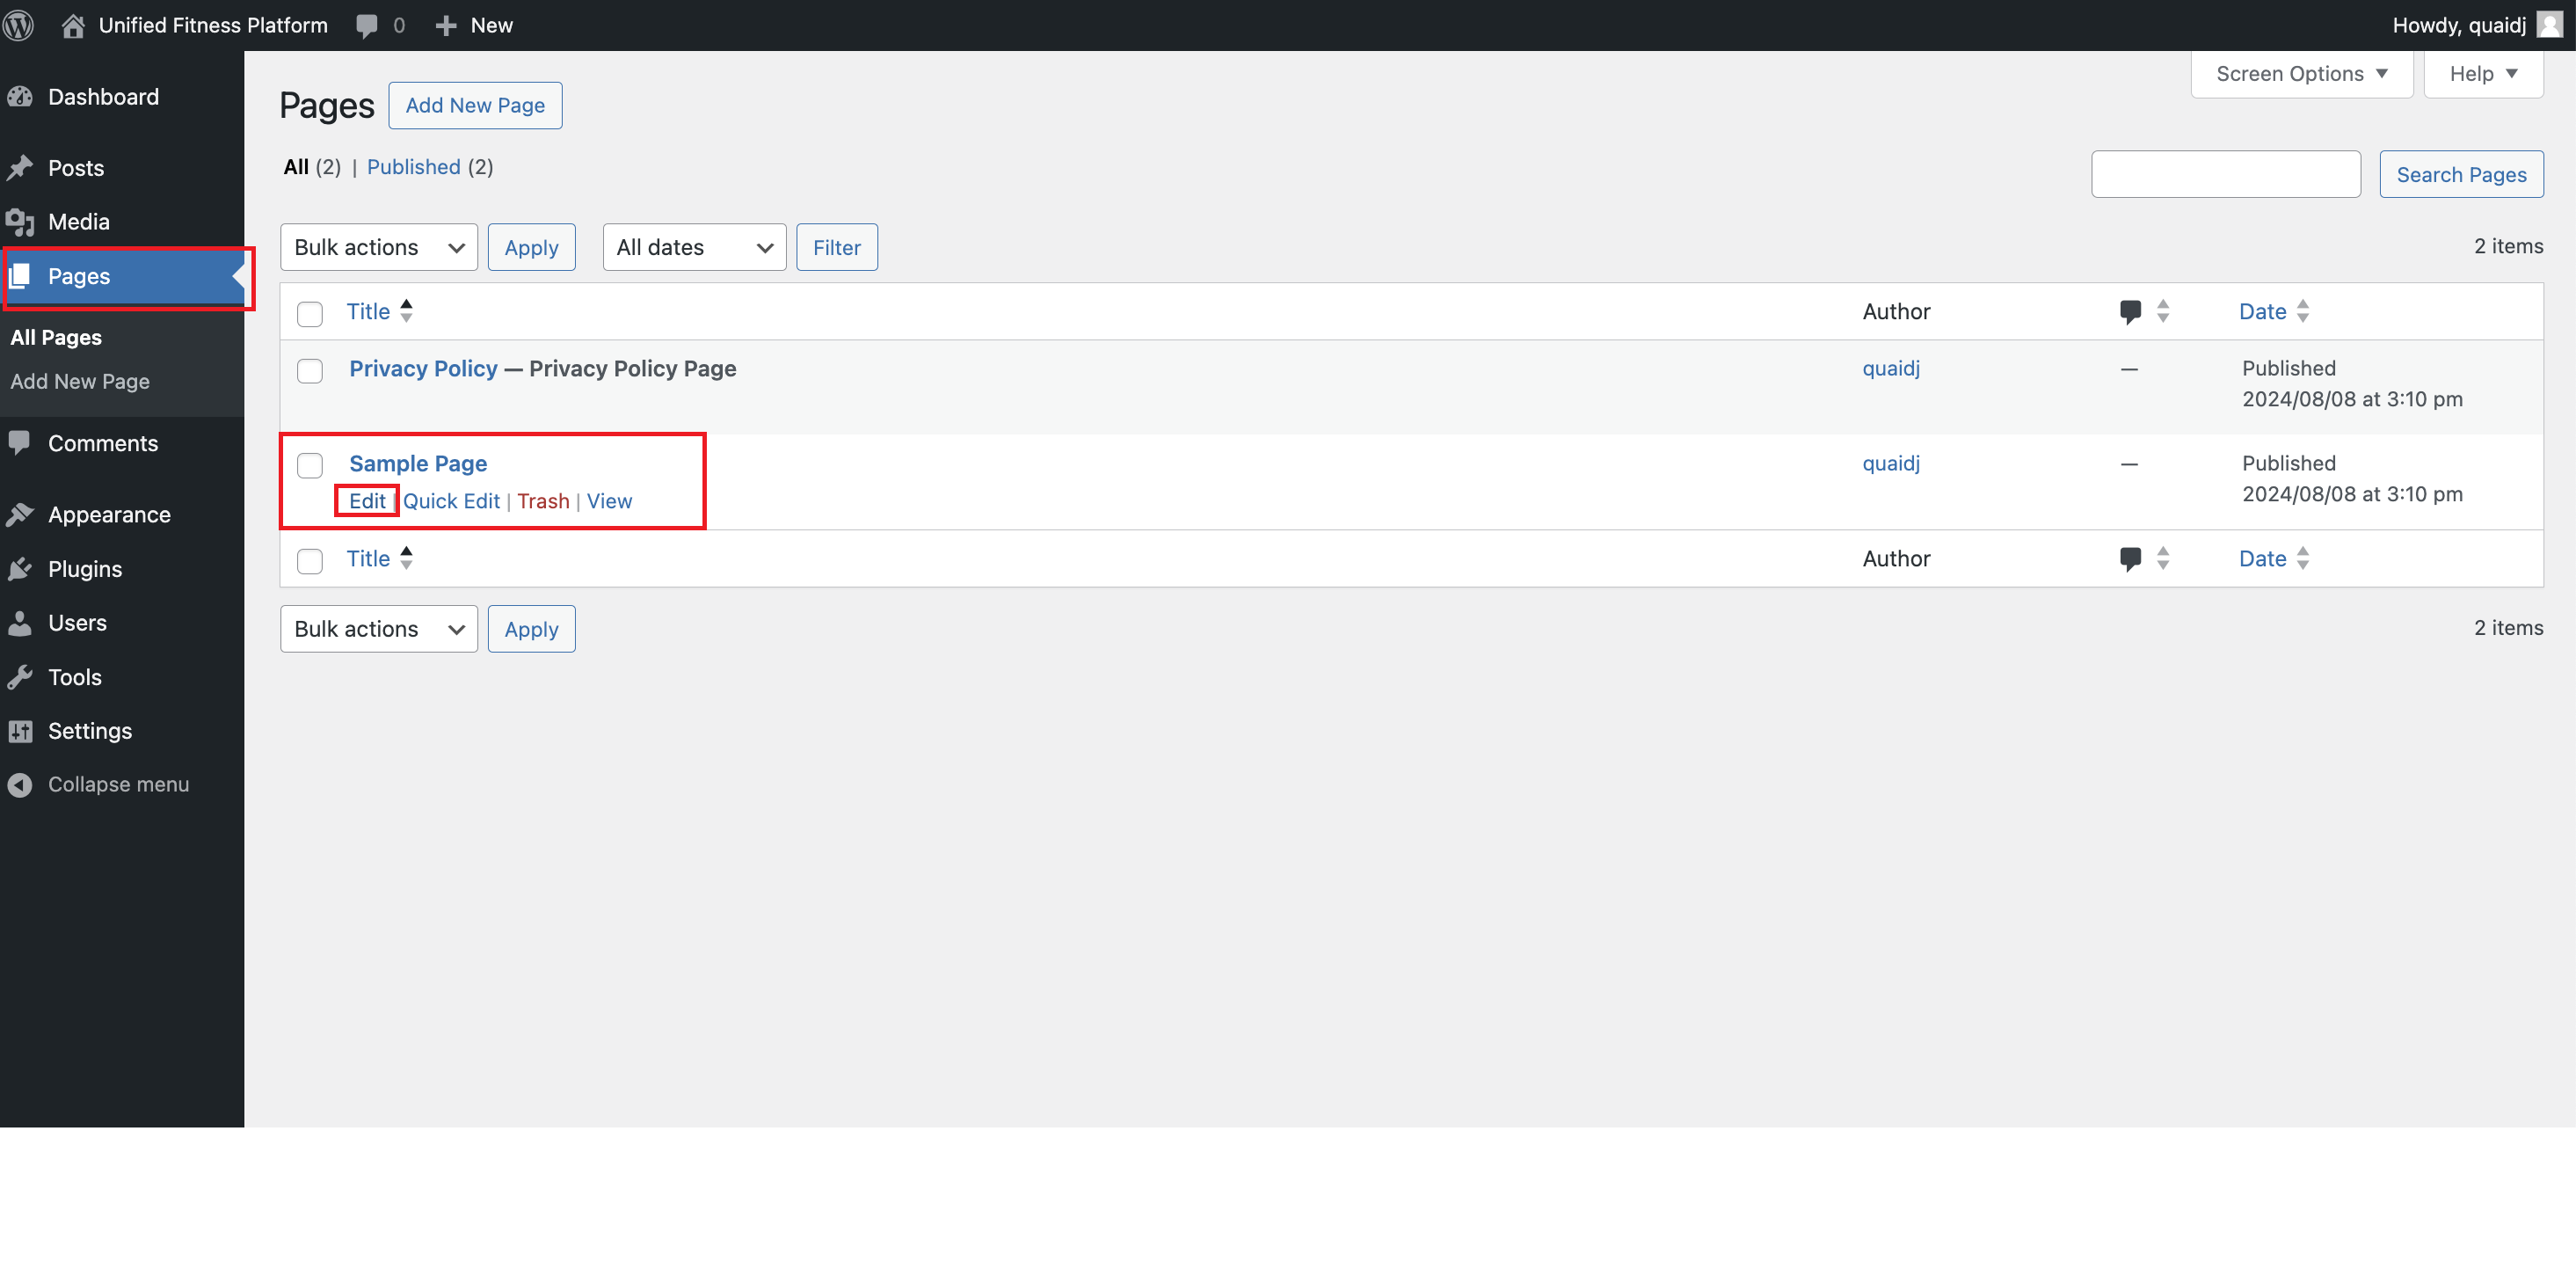
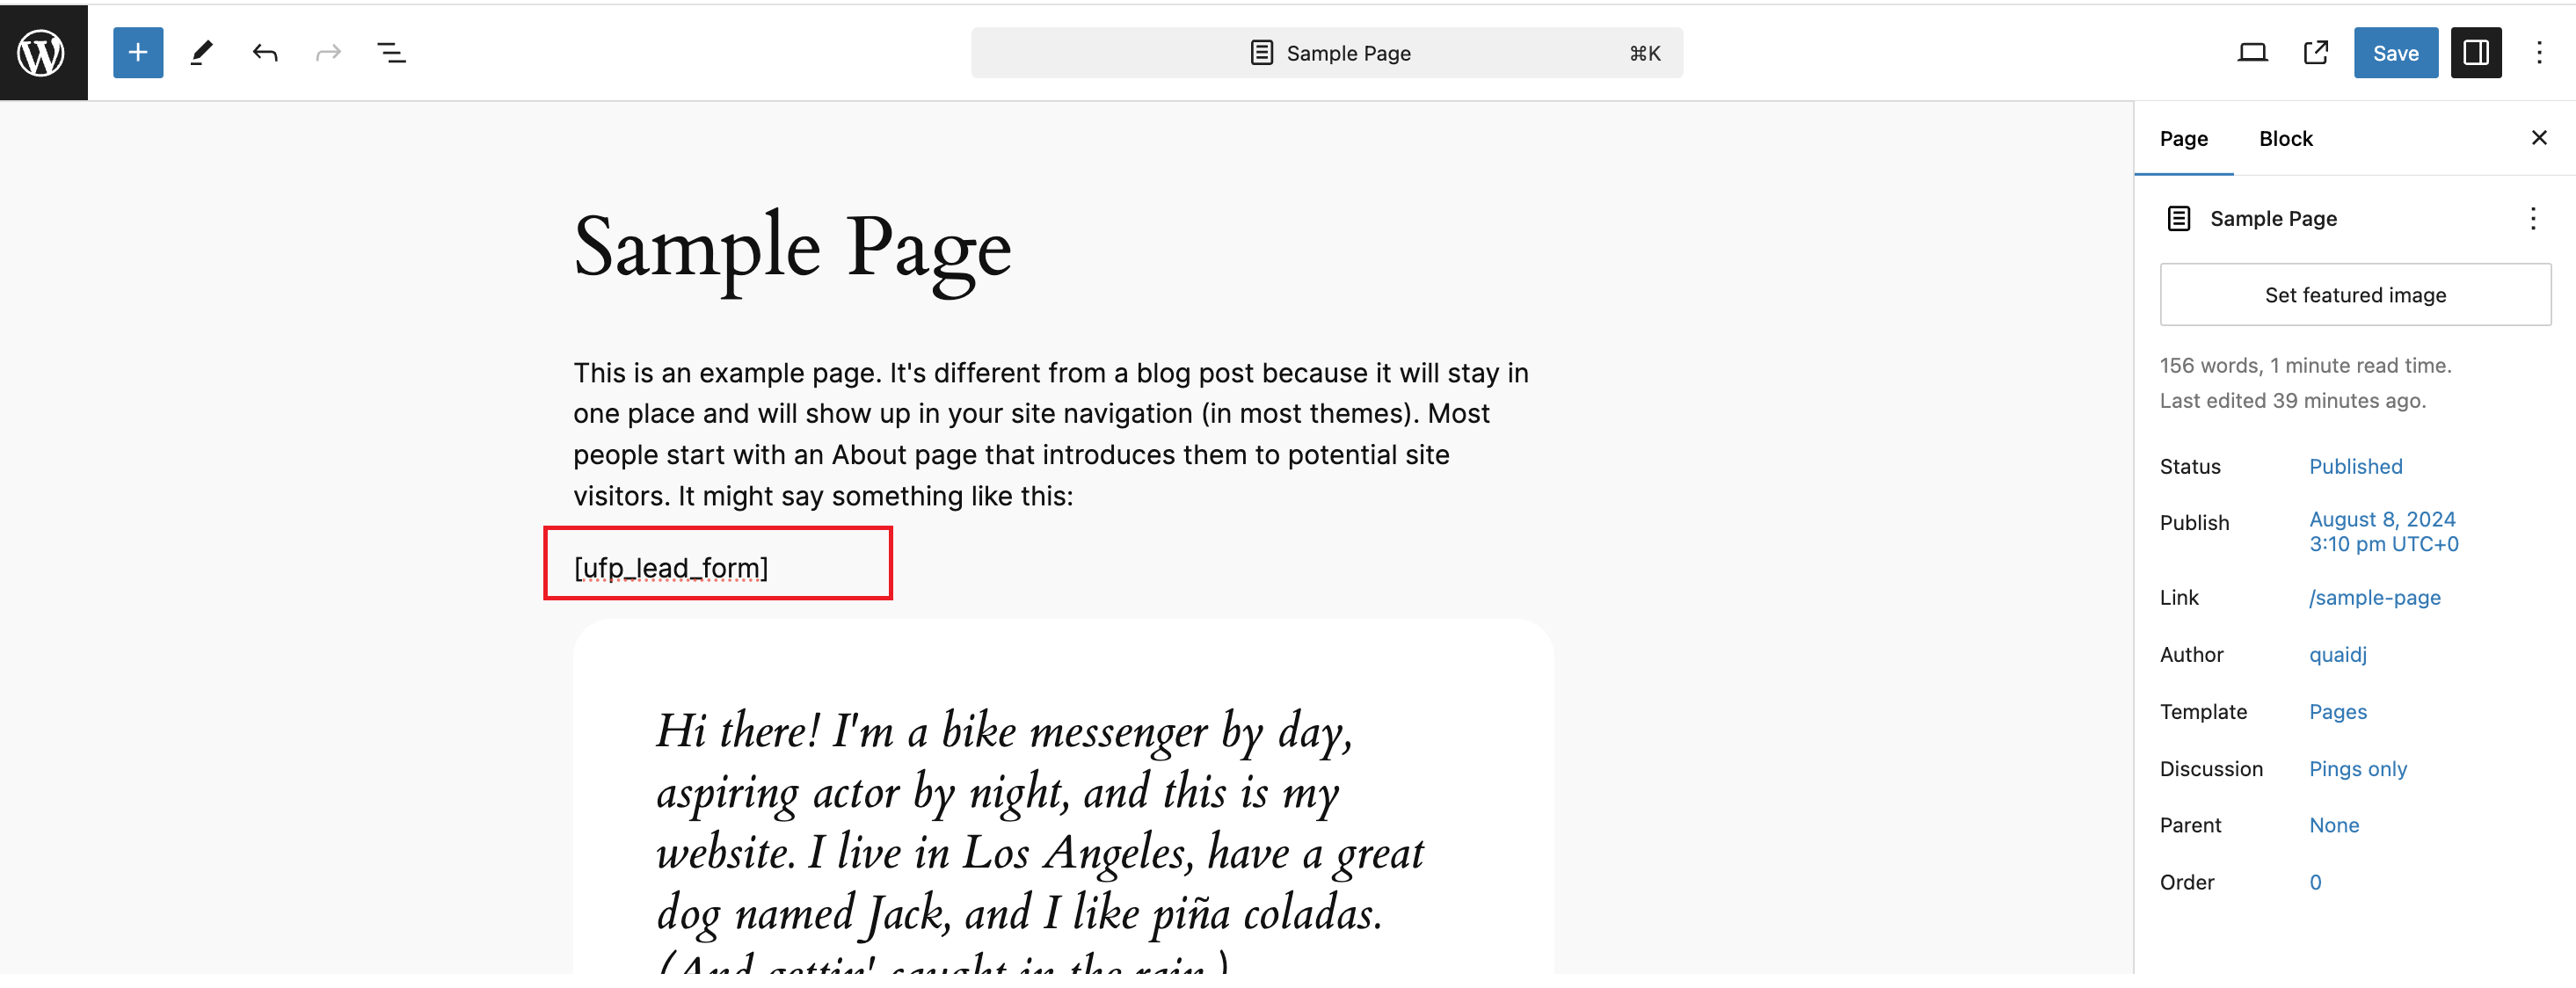
Placing the Lead Form on a Page:
Go to "Pages" in your WordPress admin panel.
Click "Edit" on the page where you want the lead form to appear.
In the edit mode, enter the shortcode
[ufp_lead_form]where you want the form to appear and save the changes.
The lead form will now be displayed on the selected page.
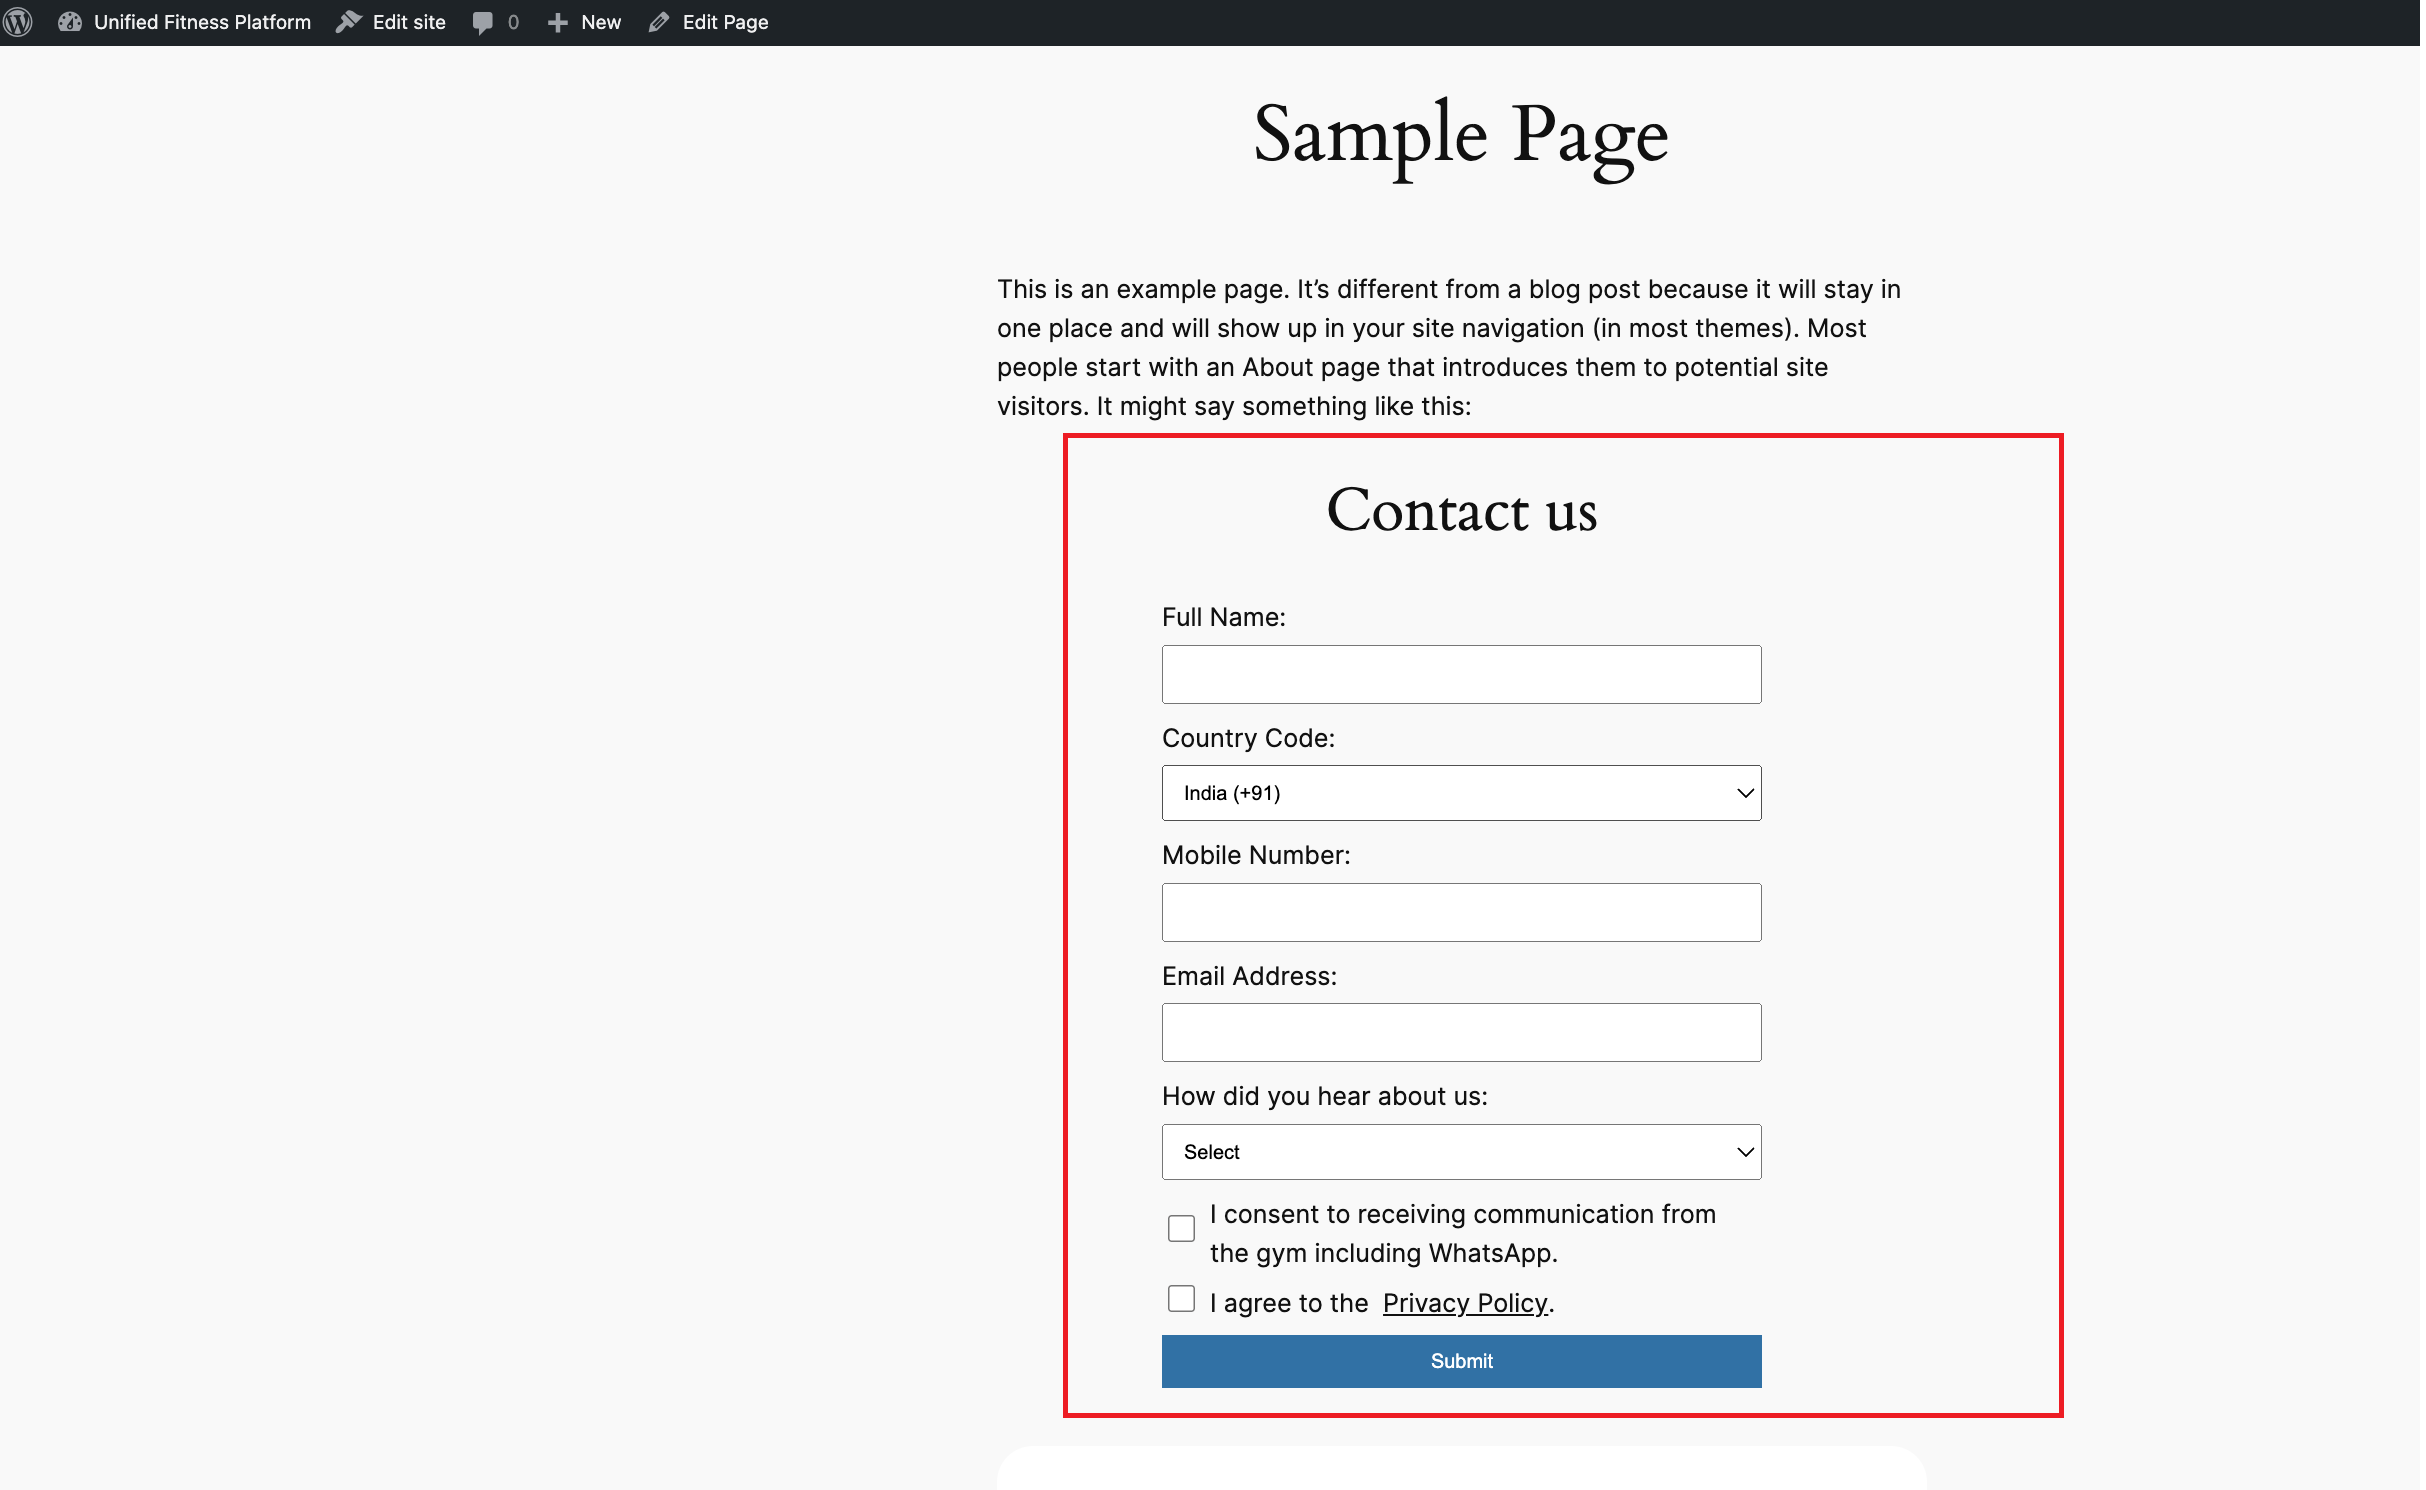
Final View of the Lead Form:
The lead form will appear like below on your website for clients to fill in their details and submit. After submission, the lead will be created in the UFP software and displayed as a ‘Prospect’ with a tag ‘WEBSITE LEAD’ on the client profile.